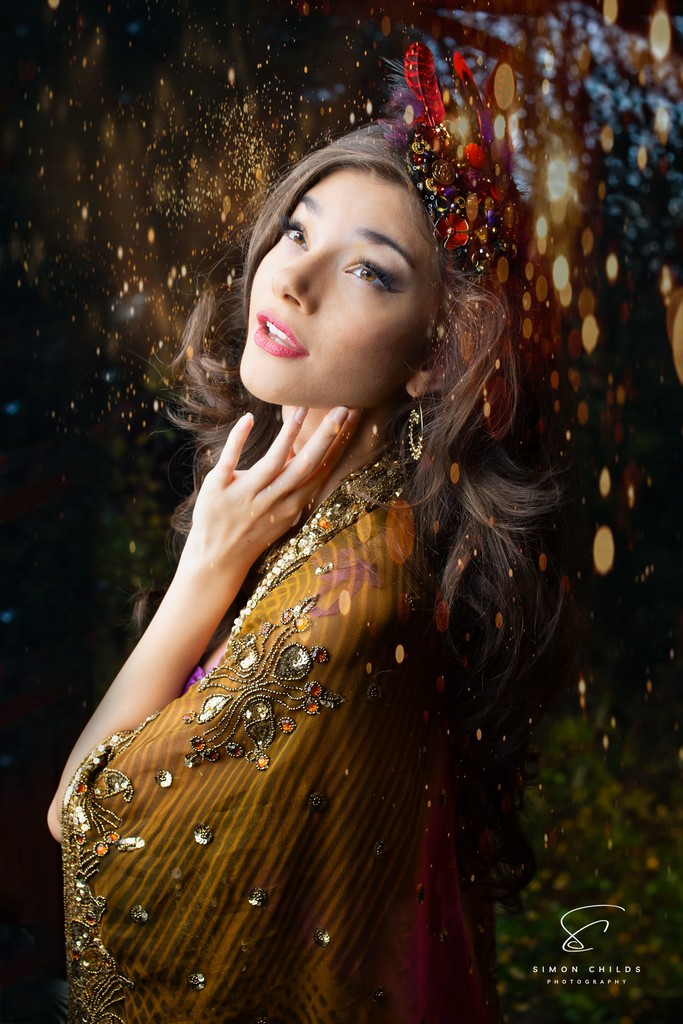
The realm of portrait photography is not just about capturing an image; it’s about encapsulating a moment, an emotion, and the very essence of the subject. It’s an art form where the interplay of light, shadow, and color comes together to tell a story. In the creation of this enchanting portrait of Elle, we delve into a narrative that is both timeless and contemporary. Here, I will share with you the intricate journey of editing and perfecting Elle’s portrait, highlighting the transformative powers of Luminar Neo, a cutting-edge photo editing software.
Step 1: Initial Assessments and Basic Adjustments
Upon importing the raw image into Luminar Neo, the first step involved an analysis of Elle’s photo. The natural beauty and expressive charm were already evident; however, our goal was to elevate this to a level of fine art. Using Luminar Neo’s intuitive interface, I began with basic adjustments. These included exposure correction, contrast enhancements, and color balancing to ensure the image’s foundation was solid. Luminar Neo’s AI-powered tools allowed me to achieve uniform lighting across Elle’s face, bringing out her natural skin tone against the golden hues of her attire.
Step 2: Portrait Enhancement
Next, we transitioned to focusing on Elle herself, employing Luminar Neo’s AI Portrait Enhancer. This module provided a suite of sliders, specifically designed to refine facial features subtly. I gently enhanced her eyes and deepened the lip color, ensuring that Elle’s gaze and smile became the focal points. Meanwhile, the AI Skin Enhancer worked its magic to smooth the skin while preserving the natural skin texture, giving Elle a flawless yet realistic appearance.
Step 3: The Magic of Bokeh
The pièce de résistance of the portrait was the captivating bokeh effect that enveloped Elle in a shower of light and color. To achieve this, I employed the Bokeh AI tool within Luminar Neo, which allowed for the precise application of the effect. I adjusted the bokeh’s size, shape, and intensity to emulate the soft out-of-focus light that one would expect from a high-end lens at a wide aperture. The golden specks were carefully placed to complement the embroidery of Elle’s attire, creating a harmonious blend of sparkle and sophistication.
Step 4: Bringing in the Sparkle
For that added touch of magic, I introduced the light-leak effect, simulating the warm, ethereal glow of light particles across the image. Luminar Neo’s Sunrays tool provided an interactive way to place a source of light that naturally interacted with the forms and spaces in the portrait, accentuating the sparkle effect. It was like Elle was amidst a celestial dance of light, where every particle seemed to celebrate her presence.
Step 5: Final Touches and Export
As a finishing touch, I fine-tuned the color grading to convey a warm, inviting atmosphere that echoed the theme of the shoot. The Mystical tool added a dreamlike quality to the entire scene, softening some areas while drawing the viewer’s attention to Elle’s expression. After ensuring that all elements were in harmony, I exported the final image, making sure to choose a high-quality file format to preserve the intricate details of the bokeh and light effects.
In conclusion, this portrait of Elle is a testament to the fusion of a photographer’s vision and the technological prowess of Luminar Neo. Every step, from the initial adjustments to the final touches, was a meticulous process of enhancing the natural beauty of the moment. The result is not just a photograph; it’s a narrative captured in a single frame, inviting viewers to pause and engage with the story it tells. This journey through the editing process highlights how Luminar Neo can be an invaluable partner in the pursuit of photographic excellence.

